Installing and Activating your Outlook Add-in for Repfabric
This page provides instructions for installing the Repfabric SyncPlus Add-In and configuration to enable 2 way contact synchronization of contacts between Outlook running on Office365 or Exchange 2013 or newer and Repfabric.
Overview of Steps:
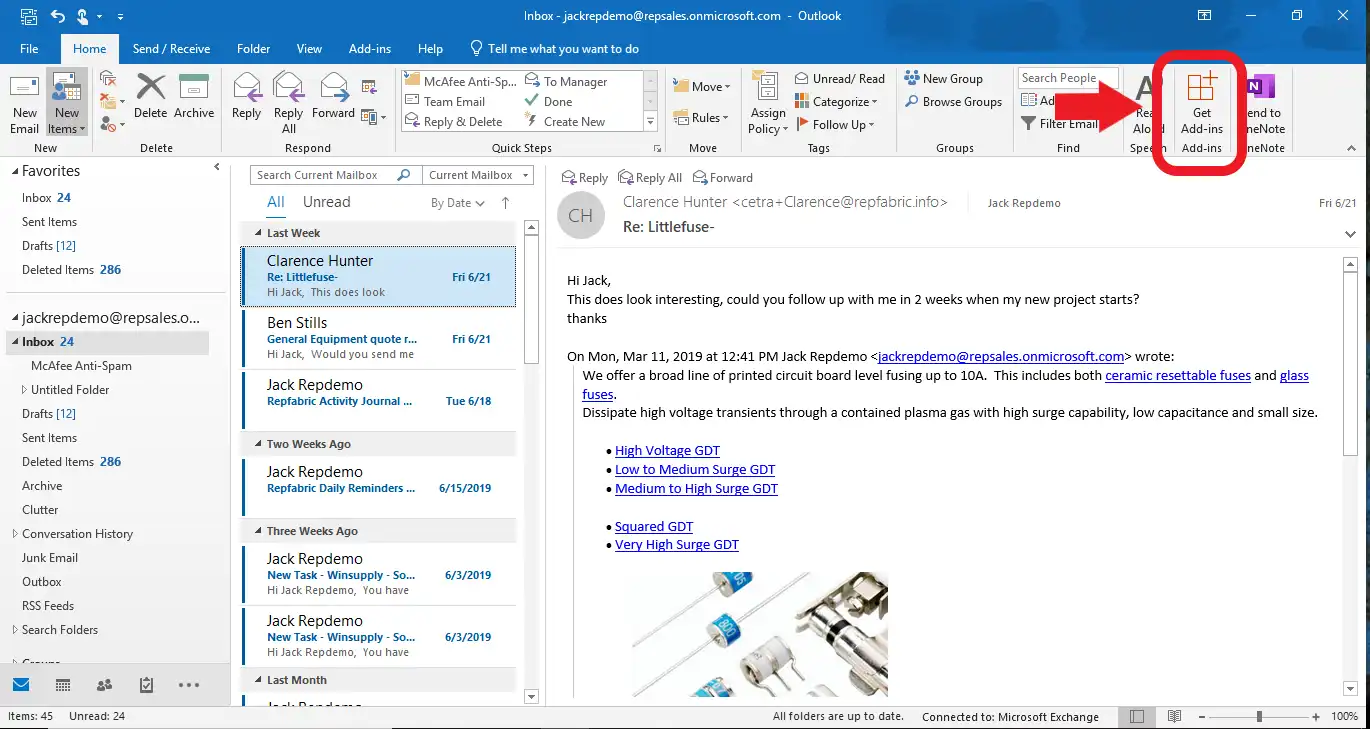
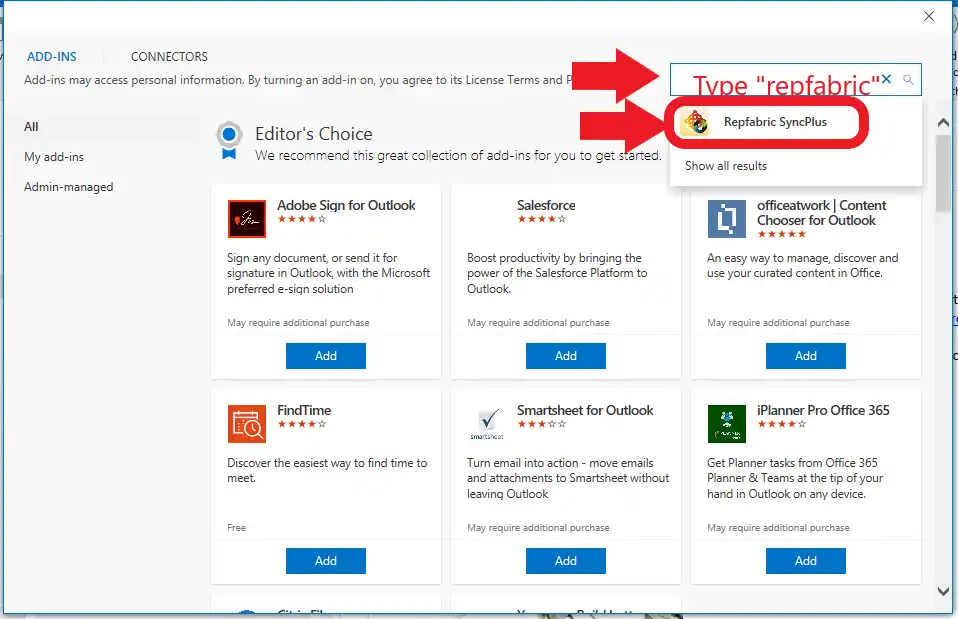
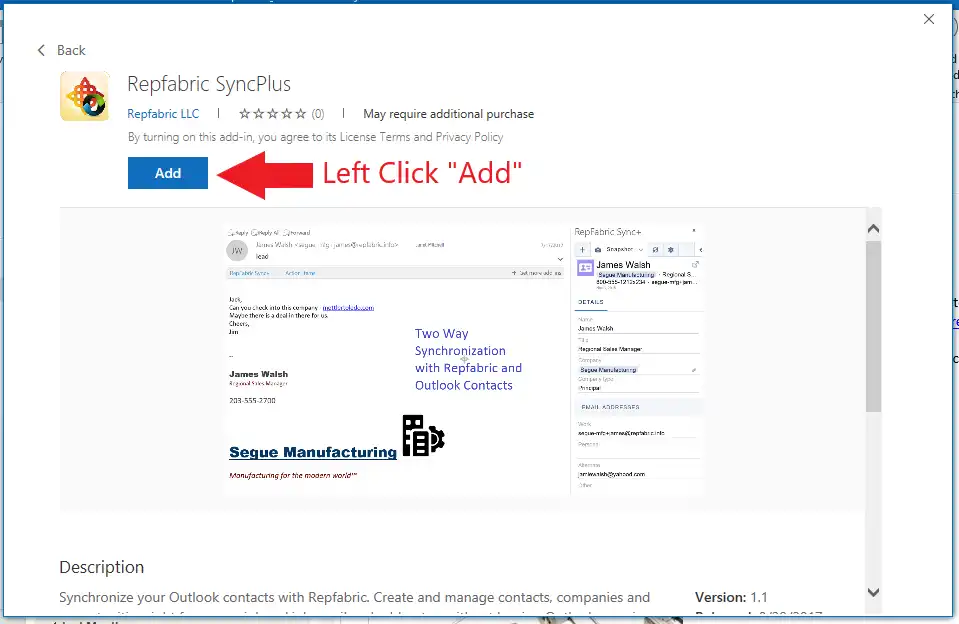
- Install the Repfabric SyncPlus Outlook Add-In on your Outlook by installing from the Microsoft store
- Trigger the Add-In by opening an email in your Outlook
- Authorize SyncPlus to read and write to your Outlook account
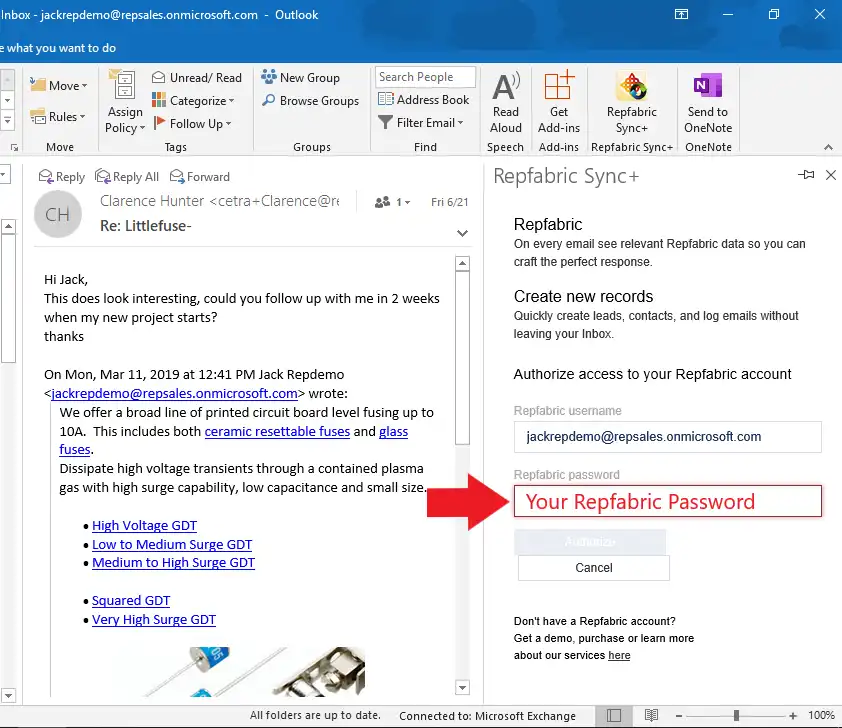
- Sign in from SyncPlus with your Repfabric user name and password
Detailed Written Steps:
- Install the Repfabric SyncPlus Outlook Add-In from the Microsoft store by following the screenshots below.


- Return to the Outlook “Home” screen by selecting “Home” tab. Trigger the addin after opening an email. An email must be open for the Addin to engage.
- Authorize SyncPlus to read and write to your Outlook account.
You will be initially prompted for permission authorization from Microsoft. Click “Accept”.
- Sign in with your Repfabric username and password. That’s all there is to it!

Troubleshooting
Can’t figure something out? Check out these common issues or contact support@repfabric.com
I DON’T SEE THE ADD-IN BUTTON FROM THE MICROSOFT STORE?
If you do not see the Outlook Add-in button, this means your administrator has not permitted installation of apps from the Microsoft store OR you do not have an Exchange mailbox running on Office365 or Exchange server 2013 or newer. Please contact your email hosting provider and request either of those backend email servers.
I AM NOT AUTHORIZED TO INSTALL ANY ADD-INS.
Sometimes your Outlook adminstrators disable your ability to install addins. Please contact them directly to give you the proper authorization.
